
How to install Meta Pixel and Conversions API on your store
When you install Meta Pixel and Conversions API correctly, Meta can learn who really buys: without reliable data, the algorithm optimizes blind. With cash on delivery you also need the Conversions API, which sends events from the server without depending on the visitor’s browser.
This tutorial explains where to find your credentials at Meta, how to add them in ReadyStore, which events are sent and when, how to test without polluting your data, and how to check deduplication and event quality.
Pixel and Conversions API: why you need both
The Pixel runs in the browser: blockers, declined consent or a page closed too soon can lose an event. The Conversions API sends the same event from the server. So Meta doesn’t count it twice, the deduplication documentation requires the Pixel’s eventID to match the API’s event_id and the event name to be identical; events are deduplicated if received within 48 hours. For more, see our Meta Pixel vs Conversions API resource.
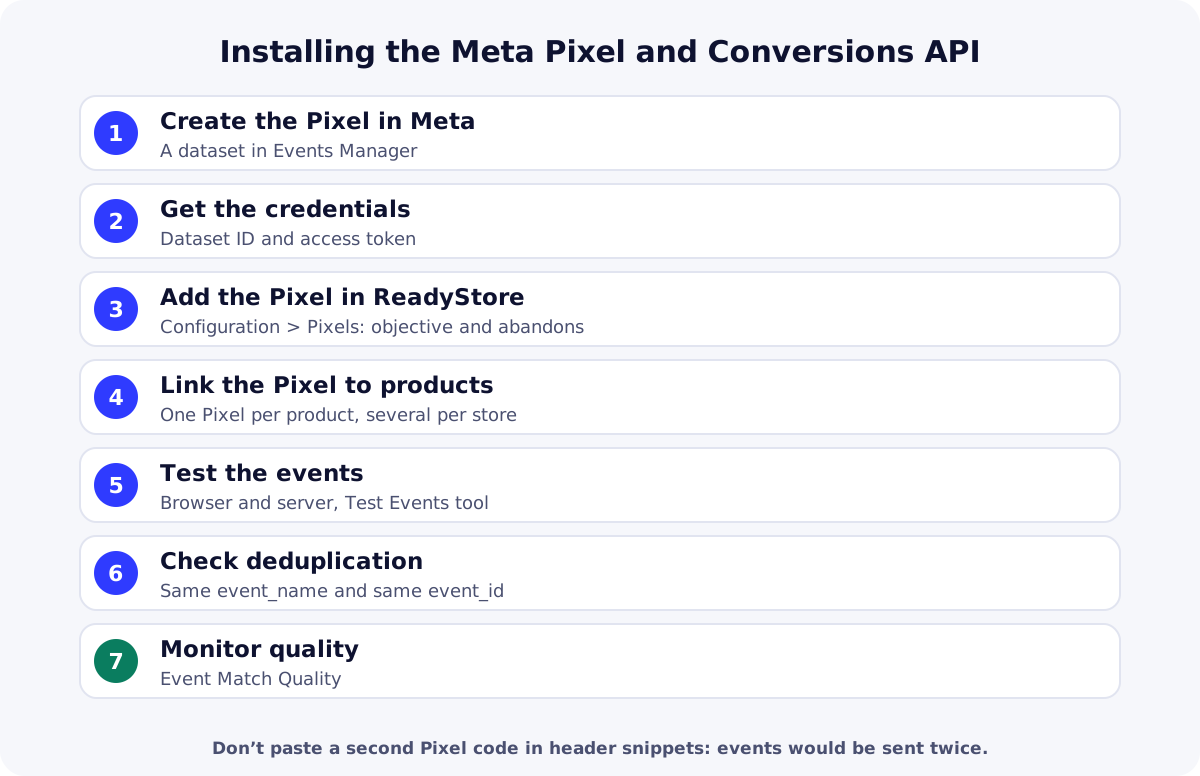
Steps 1 and 2: create the Pixel and get credentials
You create the Pixel in your business portfolio’s Events Manager (see our guide on how to create a Meta Business Manager). Note two things:
- the dataset ID (often called the Pixel ID);
- an access token for the Conversions API, generated in the dataset settings. Treat it like a password: never publish it or send it in a message.
Step 3: install Meta Pixel and Conversions API in ReadyStore
In the dashboard, open Configuration > Pixels and click Ajouter (Add). The dashboard is in French; labels are translated below:
| Field | What you enter | Note |
|---|---|---|
| Nom (Name) | A name to recognize the Pixel | For example the brand or product |
| Dataset ID | The dataset identifier | Copied from Events Manager |
| Access Token | The Conversions API token | Left empty when editing to keep the existing one |
| Objective / conversion mode | Purchase or Lead | In Lead mode, this Pixel never sends Purchase |
| Abandoned order | Purchase mode: Lead, Purchase after 15 min or no event. Lead mode: Lead after 15 min or no event | Your choice, Pixel by Pixel |
| Actif (Active) | Ticked to enable sending | Untick to pause without deleting |
Step 4: link the Pixel to your products
In each product form, pick the Pixel in the Pixel field. A product is linked to one Pixel; a store can use several. That’s handy to keep test products apart from validated ones, or several brands in the same store.
Events sent by ReadyStore
| Event | Fired when | Channels |
|---|---|---|
| PageView, ViewContent | The product page is displayed | Browser + server |
| InitiateCheckout | The customer starts the order form | Browser + server |
| Lead | Depending on your setup: saved order (Lead mode) or abandoned order | Browser + server |
| Purchase | After the order is actually saved (Purchase mode) | Browser + server |
Steps 5 and 6: test and check deduplication
In Events Manager, open your dataset and check that each event arrives from both the browser and the server, and is deduplicated. The Test Events tool shows live activity; according to Meta’s documentation, events sent with a test code are not dropped: they are used for targeting and measurement.
Step 7: monitor event quality
Meta defines Event Match Quality as a score out of 10 indicating how effective the customer information sent from your server may be at matching events to a Meta account. ReadyStore sends hashed form information plus the click and browser identifiers kept with the order; a well-filled form (correct phone number) helps matching.
Common mistakes
- Pasting the Pixel code into header snippets (“Codes header”) on top of the Pixels setup: events are then sent twice, with no shared ID.
- Wrong credentials: a dataset ID from another account, or a revoked token.
- Mixing Pixels from several stores on the same product.
- Judging too fast: give events time to show up and look at deduplication over several days.
| Need | Free option | Paid option |
|---|---|---|
| See events received | Meta Events ManagerReception, deduplication, quality, free. | Tracking consultant or agencyPaid audit; grant access with a role, never share the token in clear. |
| Understand technical parameters | Conversions API documentationMeta’s official documentation. | Tracking consultant or agencyTailored support (paid). |
Key takeaways
Installing the Meta Pixel and Conversions API with ReadyStore comes down to a few fields: dataset ID, access token, objective and abandoned-order behavior, then one Pixel per product. Then check reception, deduplication and quality in Events Manager, without polluting your data with test orders. Next step: how to structure a test campaign. Create your ReadyStore store to connect your Pixel.
Sources
- Meta for Developers — Deduplicate Pixel and server events (accessed 18 October 2026)
- Meta for Developers — Conversions API (accessed 18 October 2026)
- Meta for Developers — Using the API (Test Events) (accessed 18 October 2026)
- Meta for Developers — Dataset Quality API (EMQ) (accessed 18 October 2026)
- Meta for Developers — Meta Pixel standard events reference (accessed 18 October 2026)
Frequently asked questions
Do I need both the Pixel and the Conversions API?
They complement each other: the Pixel measures from the browser, the Conversions API from the server, which covers cases where the browser blocks the Pixel. With the same event name and event ID, Meta deduplicates and counts the event once.
Where do I find the Conversions API access token?
In Events Manager, in your dataset’s settings. Treat the token like a password: paste it only into ReadyStore’s Access Token field, don’t share it in messages, and regenerate it if it has been exposed.
How do I know deduplication is working?
In Events Manager, check each event is received from both browser and server and marked as deduplicated. Meta deduplicates when the Pixel’s eventID matches the API’s event_id and the event name is identical, if received within 48 hours.
What should I choose for abandoned orders?
It’s your decision, Pixel by Pixel: in Purchase mode, an immediate Lead, a Purchase after 15 minutes or no event; in Lead mode, a Lead after 15 minutes or no event. Choose based on how you want Meta to optimize your campaigns.
Can I use several Pixels on one store?
Yes. Each product is linked to one Pixel and a store can use several: useful to separate test products, brands or campaigns without mixing data.
Related guides
How to create a Meta Business Manager and a Page, step by step
Create a Meta Business Manager (business portfolio), a Facebook Page, an ad account and a Pixel, secure access and get your business verified the right way.
Read the guideAdvertisingFacebook ad account disabled: causes and the official appeal
Facebook ad account disabled or restricted: official causes, how to request a review from Meta, mistakes that make it worse and how to prevent it next time.
Read the guideProduct researchFacebook Ad Library tutorial: spot products that sell
A Facebook Ad Library tutorial to spot products that sell: country search, which signals to read, the tool’s limits and a simple tracking method for COD sellers.
Read the guideMeta Pixel and CAPI
Browser Pixel and server-side Conversions API sharing event IDs, one Pixel per product and preserved attribution.
Learn more
You launch the store and the ads. The center does the rest.
Create your ReadyStore store: a short COD form, Meta Pixel and Conversions API, orders and analytics in one place.