
How to create a COD online store with ReadyStore: tutorial
This tutorial shows how to create a COD online store with ReadyStore, from sign-up to your first test order. Each step follows the dashboard’s real menus and labels, so you can follow it screen by screen. The dashboard is currently in French: menu names are given in French, with an English translation in brackets.
By the end, you’ll have a store in your language and currency, a first product with bundle offers, a cash-on-delivery order form, your Meta Pixel linked to the product and, if you want, your own domain name. How long it takes depends mostly on your catalog and visuals.
What you need to create a COD online store
- Your product: photos, description, selling price and delivery fee. If you haven’t chosen yet, see our method to start a COD ecommerce business without inventory.
- Your logo and, ideally, a primary color.
- Your Meta Pixel (dataset ID) and an access token for the Conversions API, created in Meta Events Manager.
- A domain name if you want to publish on your own address (optional at first).
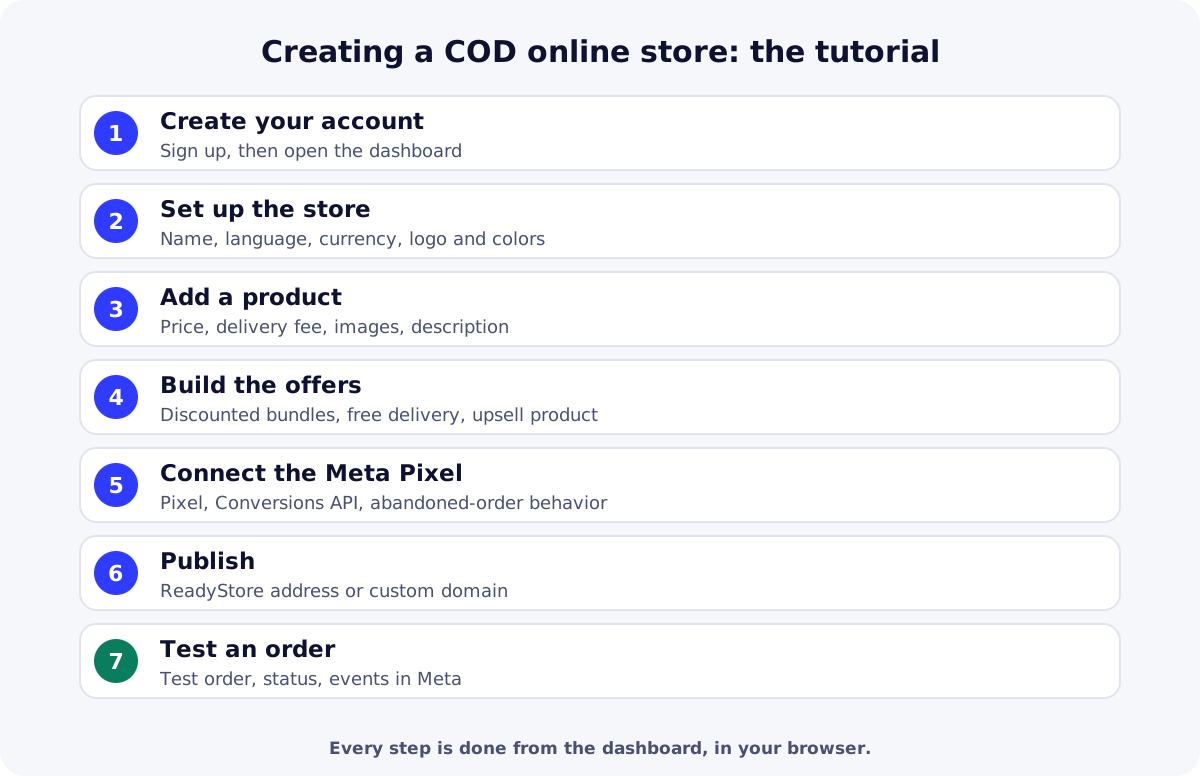
Steps 1 and 2: create your account and store
Sign up, then log in to the dashboard. In the Boutique > Boutiques (Store > Stores) menu, click “Ajouter Store” (Add store). The form asks for:
- the store name (required);
- a contact email and phone;
- the logo and favicon;
- the currency (required): more than twenty currencies are available;
- the language: French, English or Arabic (displayed right to left);
- the time zone.
To sell in several countries, create one store per market, each with its own currency, language and products. Each store’s menu also offers Dupliquer (Duplicate), handy for adapting an existing store.
Step 3: customize the store
In Boutique > Personnalisation (Customization), four blocks control how the store looks and behaves, with a live preview alongside:
| Block | What you set | Tip |
|---|---|---|
| Visual identity | Logo, favicon, homepage carousel images (hero slides) | Light, sharp images designed for mobile |
| Order form | Optional email field, offers above or below the form | Keep the form as short as possible |
| Default language and currency | Language, currency, symbol, symbol position, separator, decimals | Show prices the way customers are used to reading them |
| Theme colors | Primary color, automatic palette, shades | One action color, with strong contrast |
The COD order form on every product page asks for full name and phone, with email and full address optional, and an “order now” button showing the total. It’s short on purpose: every extra field costs orders. For more, see the cash on delivery checkout page.
Steps 4 and 5: create a category and add a product
The product form requires a category and subcategory, so create them first in Configuration > Catégories and Sous catégories (Categories, Subcategories). Then open Produits (Products) and add a product. The main fields:
- Product name, subtitle (optional), category and subcategory;
- Price and Livraison (the delivery fee charged to the customer);
- Short benefits: one per line, shown as bubbles on the page;
- Description, with visual or HTML editor, and images (main and secondary);
- On sale with a sale price, and an optional urgency banner (FOMO);
- Slug, reference and SKU;
- the Product reviews and SEO blocks (meta description in French and Arabic, keywords).
Step 6: build bundle offers and an upsell
In the product form, the Gestion Bundle (Bundle management) block turns on quantity offers. Three offers are provided by default, which you can edit:
| Offer | Quantity | Discount | Free delivery |
|---|---|---|---|
| Offre Essentielle (Essential) | 1 | 0% | No |
| Offre Duo Économique (Duo saver) | 2 | 10% | Yes |
| Offre Trio Max | 3 | 15% | Yes |
The Upsell block offers a complementary product at a new discounted price, right in the order flow. Together, bundles and upsells lift average order value, which helps absorb ad costs. Details on the bundles and upsells page.
Step 7: enter stock
Stock is managed in Gestion de Stock (Stock management), separately from the product form. Enter the quantities actually available at your service center: stock then follows order statuses, so you don’t sell what you don’t have.
Step 8: connect the Meta Pixel and Conversions API
In Configuration > Pixels, click “Ajouter” (Add):
- a name for the Pixel, so you can recognize it;
- Dataset ID: your Pixel’s identifier in Events Manager;
- Access Token: the token that enables server-side sending through the Conversions API;
- Objective / Meta conversion mode: Purchase or Lead (in Lead mode, this Pixel never sends Purchase);
- Abandoned order: what Meta receives when a customer leaves their details without confirming. It’s your choice, Pixel by Pixel: in Purchase mode, an immediate “Lead”, “Purchase after 15 min” or “No event”; in Lead mode, “Lead after 15 min” or “No event”;
- tick Actif (Active) and save.
Then open the product form and pick this Pixel in the Pixel field: each product is linked to one Pixel, and a store can use several. To understand dual browser + server sending, see Meta Pixel vs Conversions API.
Step 9: publish on your domain
Every store has a default subdomain you can use right away. For your own domain, open the store’s menu in Boutique > Boutiques, then Domaine (Domain):
- enter the custom domain (for example shop.example.com) and save;
- at your registrar, add the TXT verification record shown (name and value);
- add the routing: A records (for @ and www) to the address shown for a root domain, or a CNAME for a subdomain;
- once DNS has propagated, click “Vérifier DNS” (Check DNS): SSL and routing are set up automatically and the status switches to “Actif” (Active).
Step 10: test an order
Open your product page on a phone, pick an offer and fill in the form. The order should appear in Commandes (Orders) with the status “En attente” (Pending). The next statuses are used for processing: in progress, confirmed, handed to shipper, call back later, unreachable, busy, wrong number, cancelled.
| Need | Free option | Paid option |
|---|---|---|
| Prepare product visuals | CanvaTemplate-based visual design, free to use. | Canva ProPaid plan with extra templates, assets and tools. |
| Edit a product page video | CapCutOnline video editor, free to use with no credit card. | Canva ProSimple editing and video templates in the paid plan. |
Key takeaways
Creating a COD online store with ReadyStore takes ten simple steps: account, store, customization, category, product, offers, stock, Pixel, domain and test order. Before your first ad, go through the COD store launch checklist and check your budget with our guide on COD startup costs. Create your ReadyStore store and follow this tutorial screen by screen.
Sources
- Meta — About Meta Pixel (accessed 18 October 2026)
- Meta for Developers — Conversions API (accessed 18 October 2026)
Frequently asked questions
How long does it take to create a COD store?
It depends mostly on your content: photos, copy, offers and domain. Creating the store and a first product happens in the dashboard, with nothing to install. ReadyStore doesn’t promise a fixed time: allow time to prepare good visuals, because they’re what sells.
Do I need a domain name to start?
No. Every store has a default subdomain you can use right away. You can connect your own domain later from the store’s Domain menu, with a TXT verification record followed by an A or CNAME record.
Can the order form ask for more information?
The COD form asks for full name and phone, with email and full address optional. In Customization you can add the email field and choose where offers appear. It’s deliberately short, because every extra field reduces the number of orders.
What happens when a customer doesn’t finish their order?
The details already entered are kept in abandoned orders, so you can call the customer back. What Meta receives for these abandonments is chosen Pixel by Pixel: Lead, Purchase after 15 minutes or no event, depending on the Pixel’s mode.
Is the dashboard available in English or Arabic?
The ReadyStore dashboard is currently in French. The store your customers see can be displayed in French, English or right-to-left Arabic, chosen for each store.
Related guides
COD dropshipping startup cost: how much do you need?
COD dropshipping startup cost: stock, freight, test ad spend, center fees and a cash reserve, with a worked example and a method to size your own budget.
Read the guidePillar guideHow to start a COD ecommerce business without inventory
How to start a COD ecommerce business without inventory or staff: you run the store and ads, a service center handles sourcing, delivery and cash collection.
Read the guideHow it works
From sign-up to first order: create, configure and publish your COD store.
Learn moreCOD store launch checklist
What to check before sending ads to a cash-on-delivery store.
Learn more
You launch the store and the ads. The center does the rest.
Create your ReadyStore store: a short COD form, Meta Pixel and Conversions API, orders and analytics in one place.